At Home / DIY Theatre Lighting
Using LightKey on MacOS, along with RGBW LED lights and an Art-Net to DMX controller, you can provide a powerful and intuitive lighting setup. This guide will walk you through the installation, setup, and programming phases for your small stage show.
Install LightKey on MacOS
Section titled “Install LightKey on MacOS”
- A $80 license unlocks up to 256 DMX channels (0.5 Universe)
- A $120 license unlocks up to 512 DMX channels (1 Universe)
Most can use the least expensive option for a home install. It does not count all addresses against the license, just the ones that have lights assigned to them
Set Up Lighting Hardware
Section titled “Set Up Lighting Hardware”Position your RGBW LED fixtures according to your stage design. Ensure they are securely mounted and positioned to maximize their effect. Plug in the lights to power. Tape / ziptie / etc for securing them. Use the adjustment knobs on the lights to change and lock the angle.
Cabling
Section titled “Cabling”Summary: Using DMX lighting cables, connect the ArtNet controller to the splitter, and then run DMX cables out in each direction to daisy-chain lights from there. Each light has a DMX input and output. Try to avoid chaining the cables; if you do, make sure to test that it works.
Positioning the DMX Splitter
Section titled “Positioning the DMX Splitter”Place the DMX splitter in a strategic location, ideally close to the middle of the lighting area. This allows light runs to go in each direction (to back of stage, to front of stage, to overhead lights, to rear lights, etc)
Connecting DMX Source to Splitter
Section titled “Connecting DMX Source to Splitter”Connect the DMX output of the Art-Net controller to the DMX splitter’s DMX IN. Splitter needs to be powered and turned on. See later in the document for ArtNet settings now or once wiring is done
Distributing DMX Signals
Section titled “Distributing DMX Signals”From each output on the DMX splitter, connect a DMX cable to the input of your first lighting fixture in each line.
Continue daisy-chaining fixtures as normal from there. Maximum number of fixtures in a single DMX chain is usually around 32.
Between every light needs a DMX cable.
Understanding DMX Addressing
Section titled “Understanding DMX Addressing”DMX Address: A unique identifier assigned to each lighting fixture, determining the starting point from which it listens to the control signals on the DMX universe. DMX addresses range from 1 to 512. Channels: Each fixture uses one or more channels to control its functions, such as brightness, color, pan, tilt, etc. The number of channels depends on the fixture’s complexity.
Steps for Programming DMX Addresses
Section titled “Steps for Programming DMX Addresses”Channel Requirements: Check how many channels each of your fixtures requires. This information is usually found in the fixture’s manual.
Plan Your Addresses:
Section titled “Plan Your Addresses:”Start by assigning address 10 to your first fixture. Subsequent fixtures should be assigned addresses based on the number of channels the previous fixtures use.
It’s common practice to increment the channel address by 10 even if each fixture uses fewer channels than that:
- Light_1 is address 10
- Light_2 is address 20, etc
Order does not matter, only that the lights don’t overlap or have the same address (unless you want multiple lights of the same model to always be the same color, then it’s fine to reuse addresses)
If you want to have different sections of lights starting in different batches, that’s fine too.
- Rear lights: 10-99
- Side lights: 200-299
- Back lights: 300-399
- etc
Set Addresses on Fixtures
Section titled “Set Addresses on Fixtures”Most modern fixtures have a digital display and buttons for setting the DMX address. Navigate the fixture’s menu to find the DMX address setting, then input the desired address.
The DMX setting usually starts with d but it could start with a on some lights
Document Your Addressing
Section titled “Document Your Addressing”Keep a clear record of which DMX addresses are assigned to each fixture. This makes programming your console or software easier and helps with troubleshooting. Usually you do this when you patch in LightKey
Test Your Setup
Section titled “Test Your Setup”Once all fixtures are addressed, test them with your console or software to ensure they respond correctly to their assigned addresses and channels.
WARNING
Section titled “WARNING”Sometimes if a light is not powered for a while, it will lose the internal settings and forget what address it is. If in doubt, keep the lights powered in between shows (they can all be set to dark, while still being powered). And test before the show starts.
Tips for Success
Section titled “Tips for Success”Start at 10: Start your first fixture at DMX address 10 to keep things simple and organized. Many lights default to channel 1; setting some random values on channel 1-5 will help you find unprogrammed lights.
Group Similar Fixtures: If you have multiple fixtures of the same type, group them together in your DMX address sequence for easier control.
Leave Gaps: Consider leaving a few spare channels between fixture groups to allow for future additions or adjustments without readdressing everything.
Use DMX Tools: DMX addressing tools or calculators can help plan your addresses and visualize your DMX universe.
Setting Up LightKey
Section titled “Setting Up LightKey”Configure Art-Net to DMX Controller
Section titled “Configure Art-Net to DMX Controller”Connect your Art-Net to DMX controller to your network and configure it to connect to the same network as your Mac.
This usually involves setting the IP address of the controller to match your network configuration. The controller should have an IP address already set at something like 192.168.1.100
Network Configuration
Section titled “Network Configuration”On your Mac, go to System Preferences > Network and ensure your computer is connected to the same network as your Art-Net to DMX controller.
Verify the network settings (IP address, subnet mask) to ensure they are compatible with the Art-Net protocol. This shouldn’t be necessary unless the network is weird. Talk to someone at the venue if they have a special network configuration.
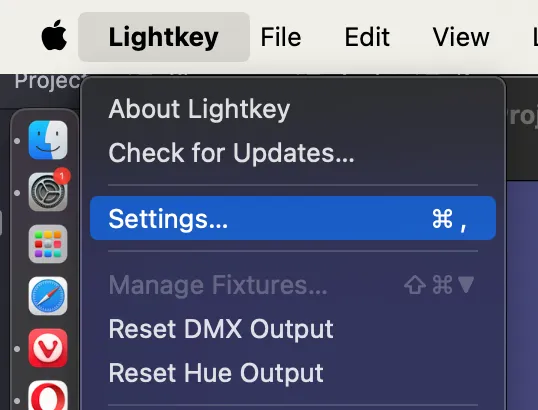
LightKey Settings
Section titled “LightKey Settings”Lightkey is a little weird about network settings, so I’d recommend using Broadcast mode even though it spams the network a bit. If you have a project open, network options are in settings.

Use ArtNet
- Mode: Manual
- Net: 0
- Subnet: 0
- Options: Use broadcast and Use limited broadcast
Programming Your Show
Section titled “Programming Your Show”Discover and Patch Your Fixtures
Section titled “Discover and Patch Your Fixtures”
In LightKey, go to the “Manage Fixtures” page to add your fixtures. You can search for the specific model of your RGBW LEDs in LightKey’s fixture library.
Once found, drag your fixture to the patch list, and set the DMX address corresponding to the address you’ve set on the physical fixture. Repeat this for all your fixtures.
If LightKey does not have your specific fixture, you may need to create a custom fixture profile, ensuring you map the RGBW channels correctly.
Manual settings are a little tedious, but use the documentation for the light to configure the settings.
See below for the fixtures Ben owns.
Lights owned by Ben
Section titled “Lights owned by Ben”(Built-in to LightKey)
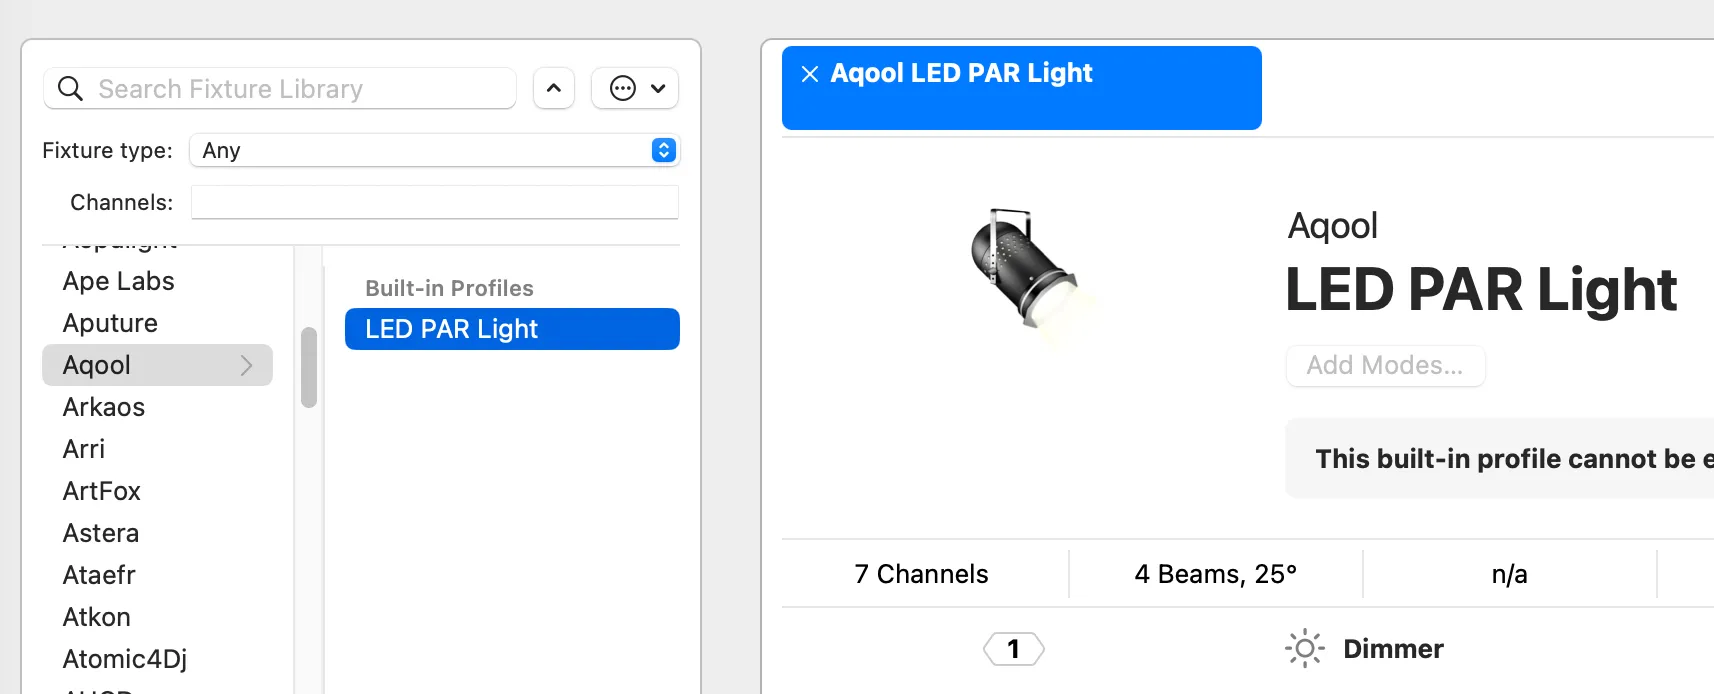
U’King Mini Spot Moving Head (Built In)
Section titled “U’King Mini Spot Moving Head (Built In)”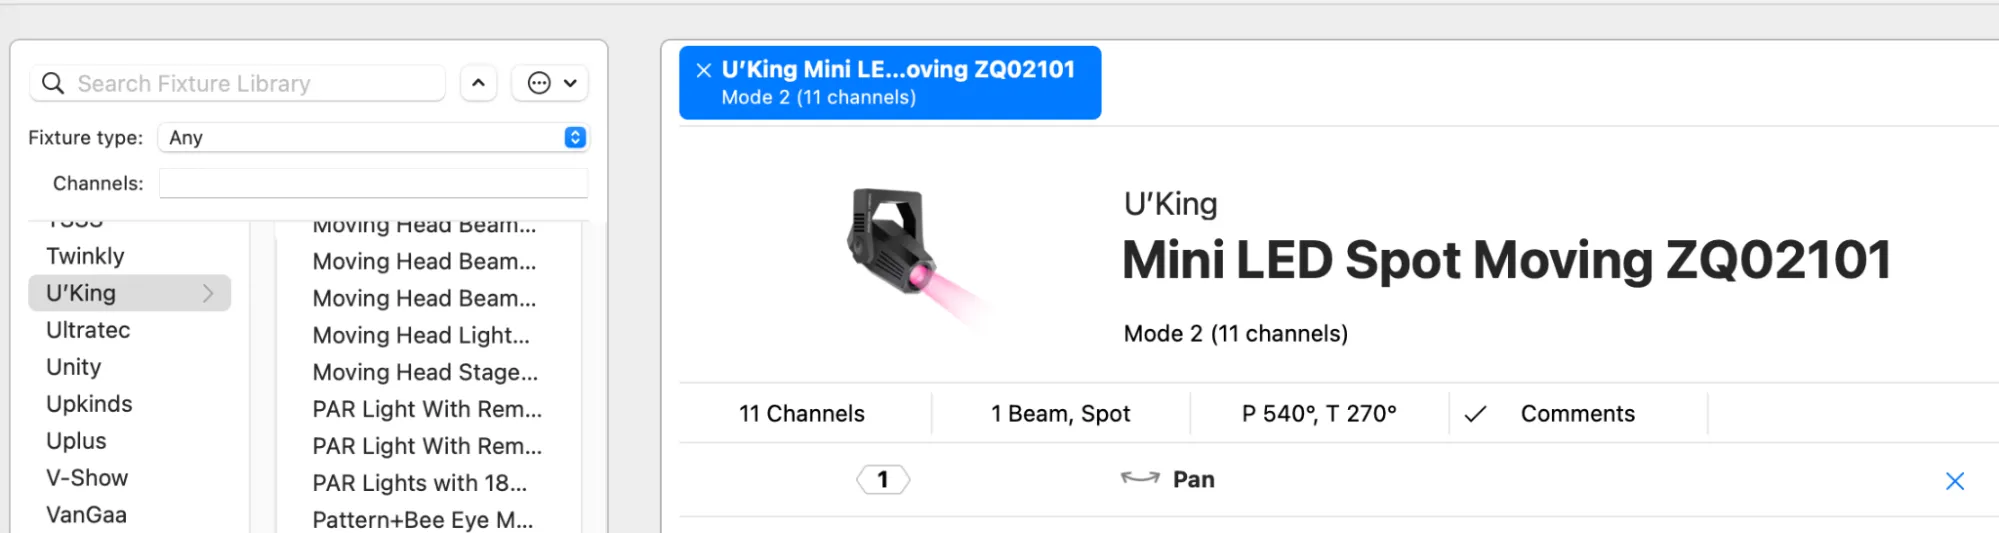
Ataefr (User Created)
Section titled “Ataefr (User Created)”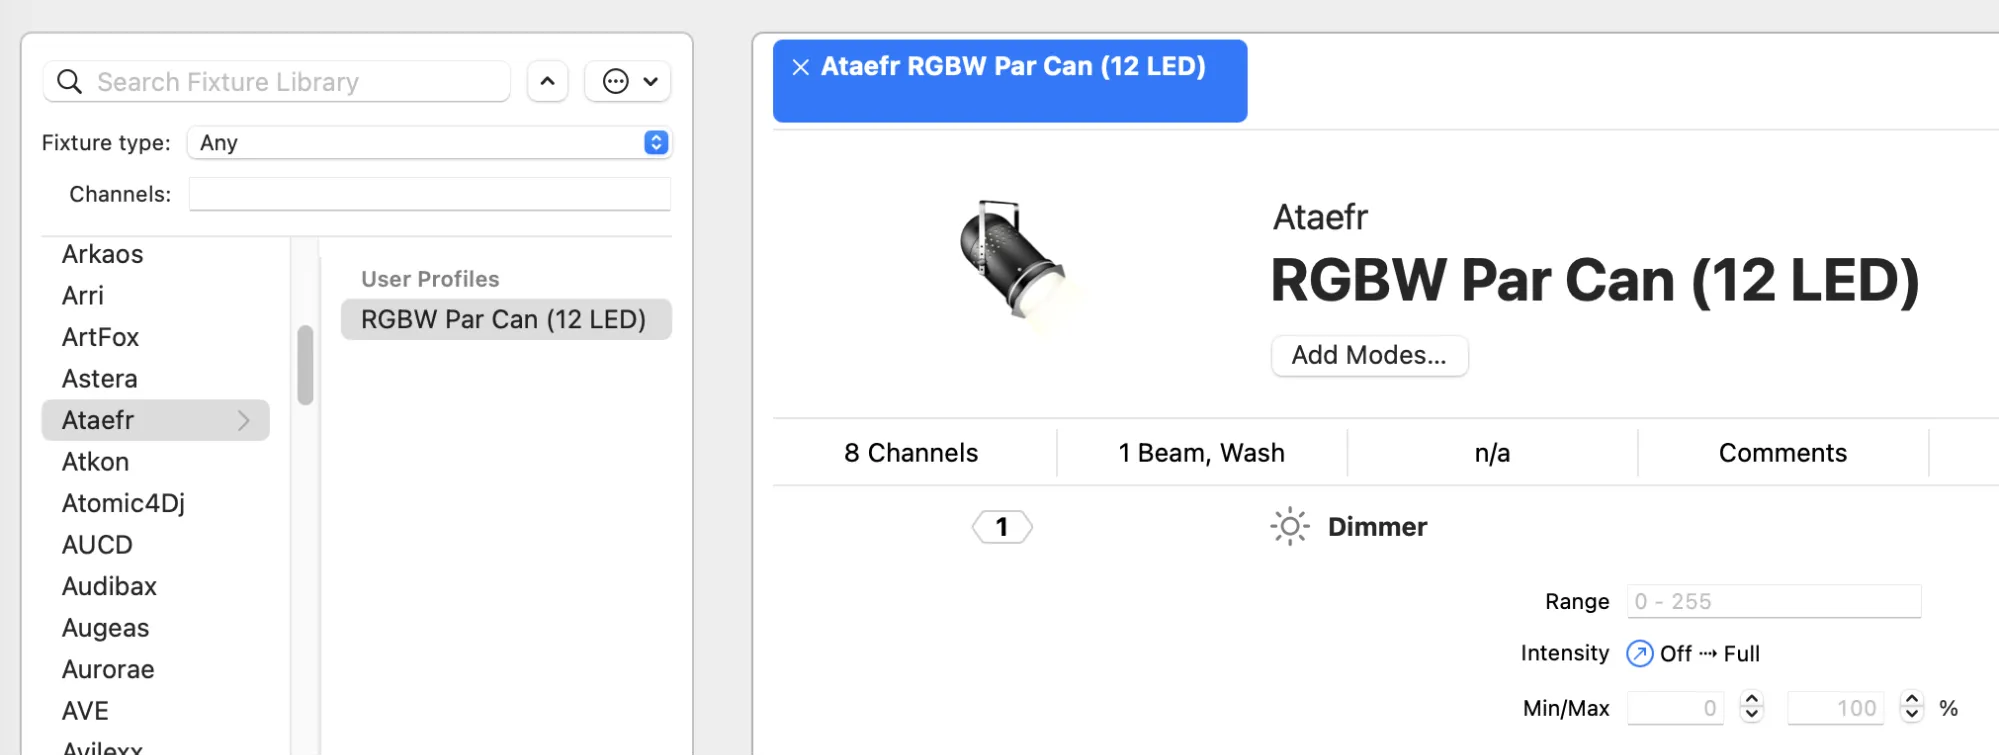
Import the file from here https://drive.google.com/file/d/1WVugaGa96LvmQ8bH2N4EsXHE7aGJt0RZ/view?usp=sharing
HSL - Beam (User Created)
Section titled “HSL - Beam (User Created)”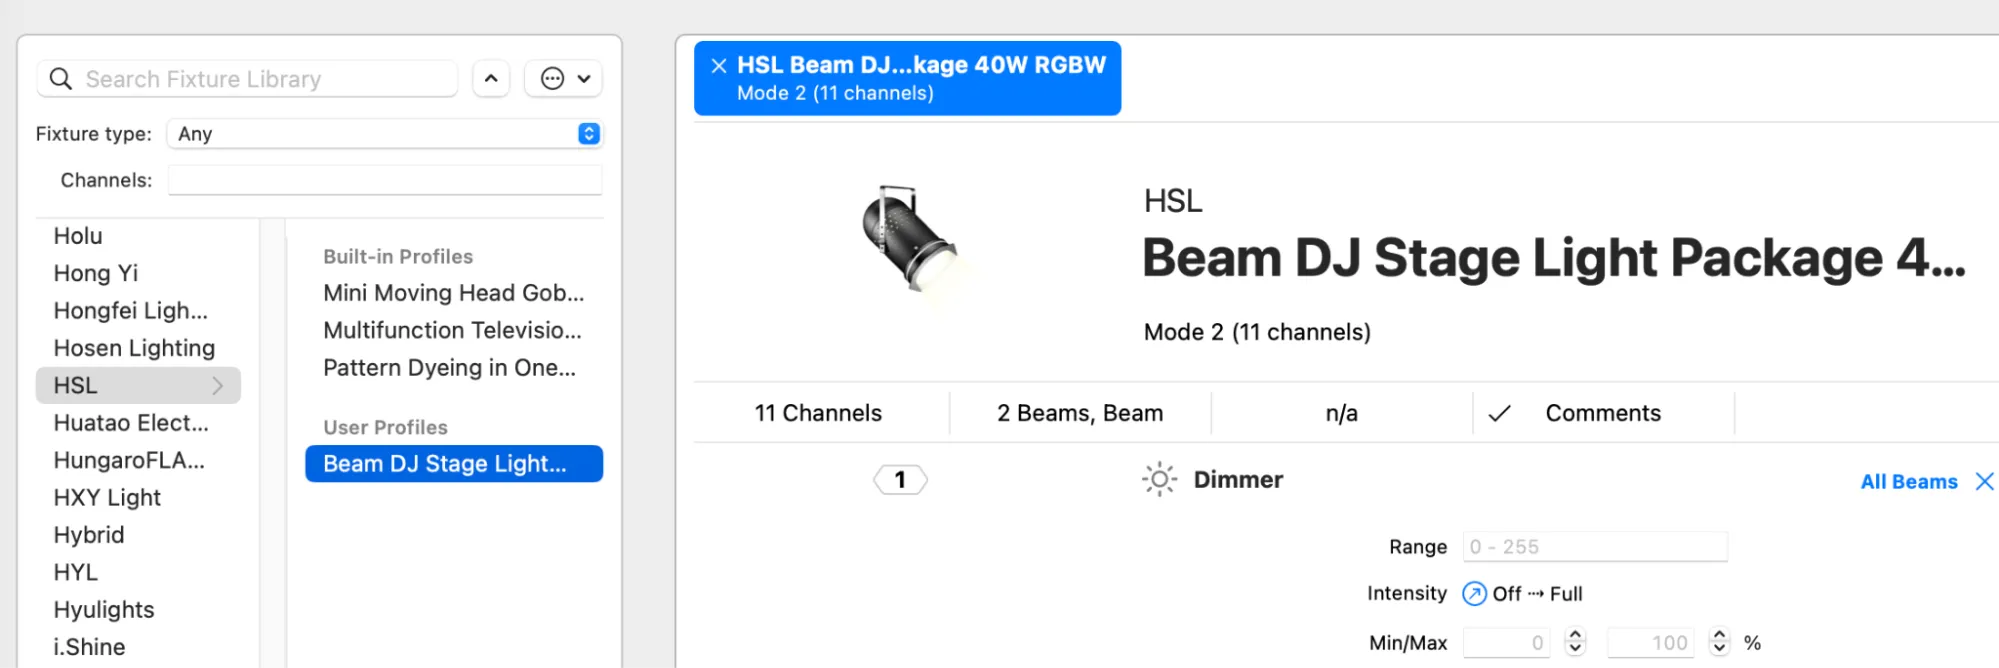 Import the file from here
https://drive.google.com/file/d/1YcRlHVPsFEII9z8mIU2BORNuuJ5c3bT-/view?usp=drive_link
Import the file from here
https://drive.google.com/file/d/1YcRlHVPsFEII9z8mIU2BORNuuJ5c3bT-/view?usp=drive_link
HOLDLAMP (User Created)
Section titled “HOLDLAMP (User Created)”
Import the file from here https://drive.google.com/file/d/1RZVAn3V9lVo2ok2qyxQpIFPuRLijI01-/view?usp=drive_link
Patching Lights in LightKey
Section titled “Patching Lights in LightKey”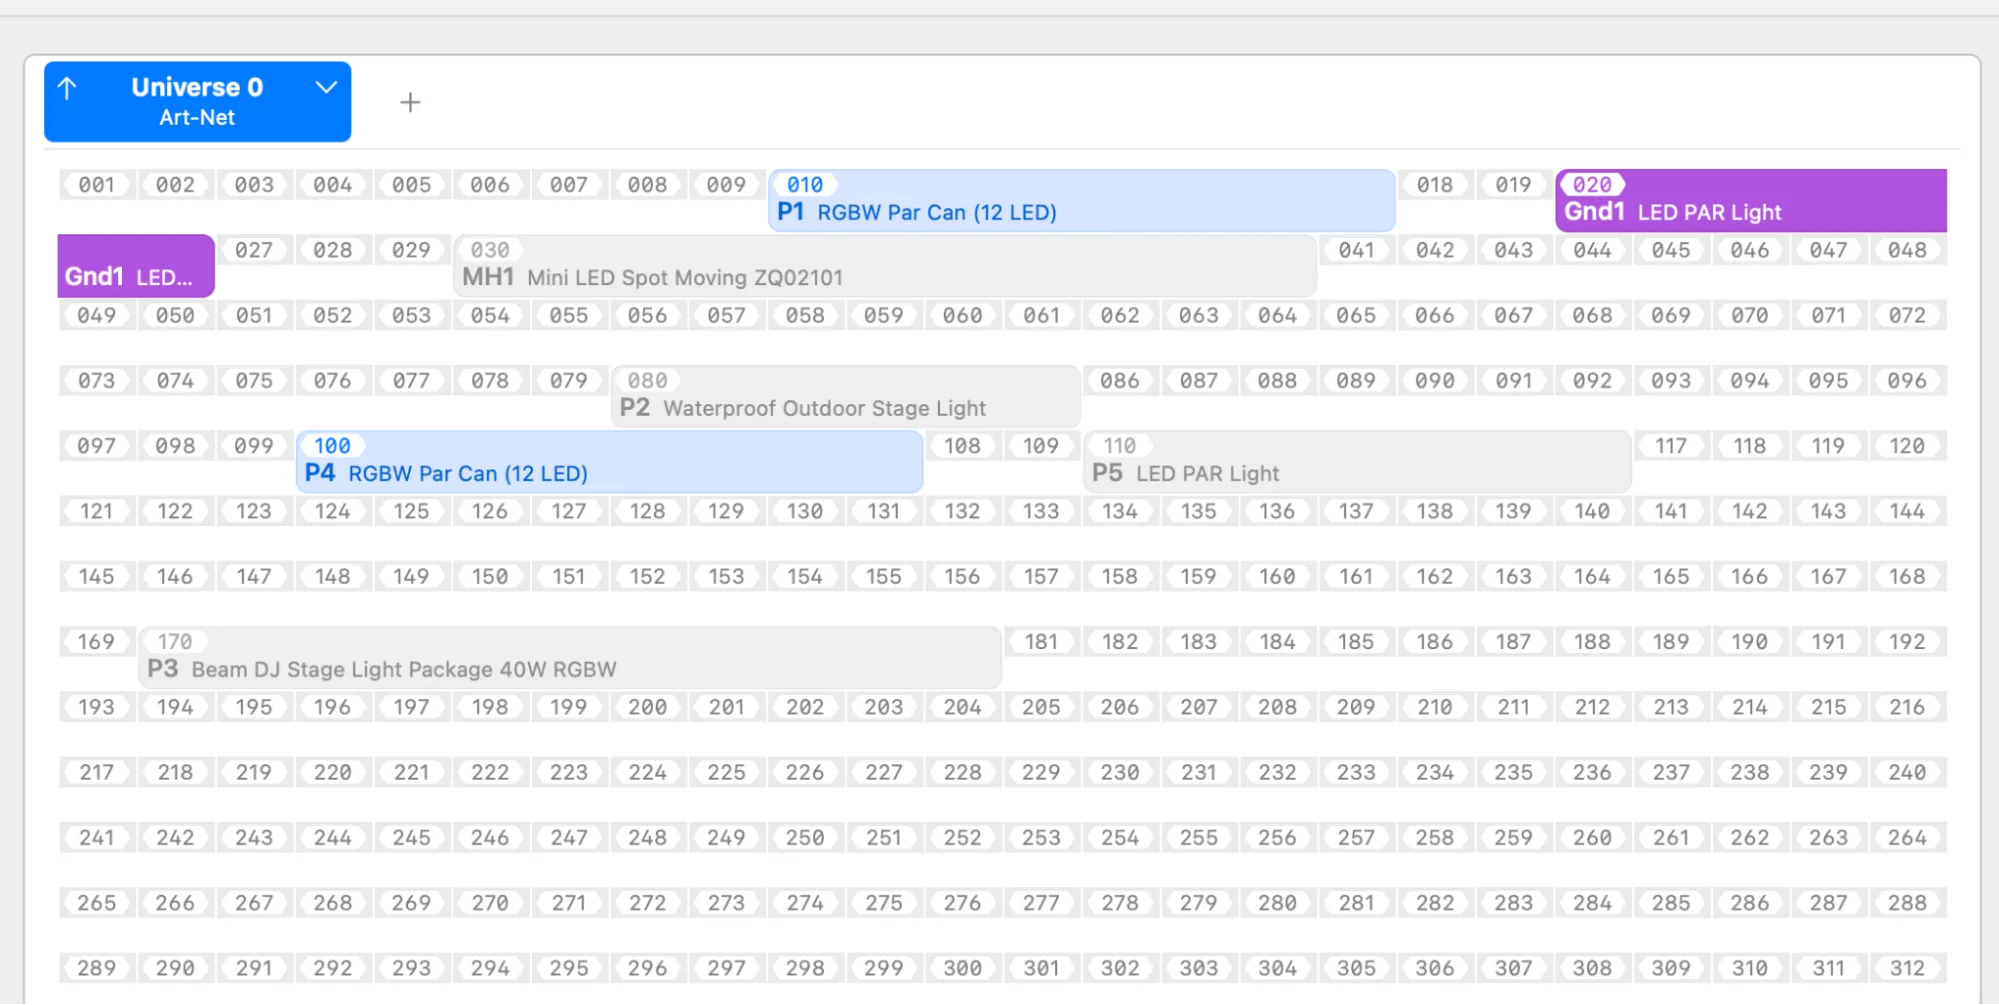
You’ll have a patching page that looks something like this. You may have more lights, or they may be laid out in a different clustering:
Create Your Stage Layout
Section titled “Create Your Stage Layout”Switch to the Design tab in LightKey, where you can visually arrange your fixtures to match their physical layout on your stage. This step is not mandatory but helps in visualizing your lighting design.

It’s all assuming a two dimensional stage, but you could set up multiple 2d “stages” even if they’re in different physical locations in real life.
Programming Scenes and Effects
Section titled “Programming Scenes and Effects”- Move to the “Live” tab to start creating your lighting scenes.
- Select a fixture or group of fixtures by clicking on them. You can adjust their properties (color, intensity, etc.) using the control sliders or color wheel for RGBW color mixing.
- To save a look as a scene, adjust your fixtures to the desired settings, and then click the “Save as new preset” button. Name your scene for easy recall.
- You can cluster scenes into groups. I recommend a group for each show, and a different groups for testing or sandbox.
- You can also apply effects like chases or fades by using the “Effects” panel. Drag an effect onto a fixture or scene to apply it.
Sequence Your Show
Section titled “Sequence Your Show”- Use the “Cue List” to sequence your scenes and effects in the order and timing you want them to play during your show.
- You can set the duration, fade times, and trigger conditions for each cue.
Rehearse and Adjust
Section titled “Rehearse and Adjust”- Run through your cue list and observe the lighting. Make adjustments as necessary to timing, intensity, and color to ensure the lighting complements the performance.
- Utilize LightKey’s “Live Control” feature for on-the-fly adjustments during the show.
Backup Your Show
Section titled “Backup Your Show”- Save your LightKey project and consider exporting it as a backup. Keep a copy on an external drive or cloud storage for added security.
Tips for a Successful Show
Section titled “Tips for a Successful Show”Test Your Network: Ensure a stable connection between your Mac, the Art-Net to DMX controller, and the fixtures.
Check Power Requirements: Confirm that all fixtures and controllers are adequately powered and safely connected.
Safety First: Secure all fixtures and cables to prevent accidents.
Have a Backup Plan: Be prepared with a basic backup lighting setup in case of technical difficulties.
Questions
Section titled “Questions”Email: ben@ this domain name (.com)